Installing wood paneling over drywall is a great way to improve the appearance of a room on a budget. Paneling can be used to cover up old or damaged walls, or it can be added as a decorative element. In this step-by-step guide, we will walk you through the process of installing paneling over drywall. Let’s get started!
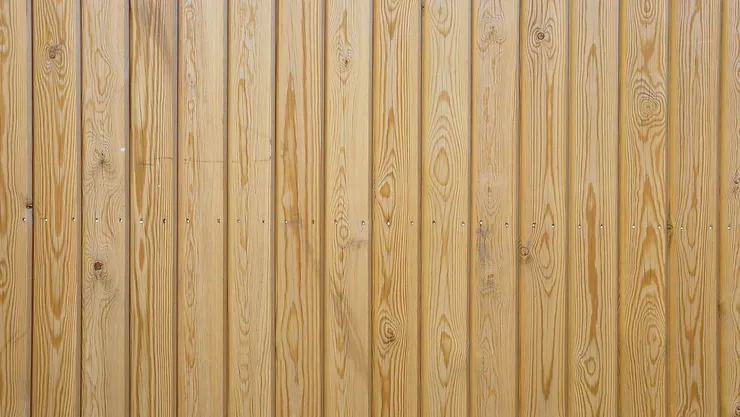
What to Keep in Mind Before Starting
Keep in mind while choosing your panels that they will be installed around doors and windows. As a result, choose a panel that matches or sits lower than the thickness of your door frames and window casings. The panels will protrude if they are thicker, and the contrast may be evident. The best way to avoid this mistake is to purchase matching framing from your reclaimed wood supplier so the wall and framing fit perfectly together.
If you’re using barn siding or another panel with visible holes or joints, paint the underlying wall a matching or darker color than your panels. This will prevent large visible white spaces behind the installed wallboard.

Tools you’ll need include:
Soft-lead pencil
Flathead screwdriver
Level
Tape-measure
Stud finder
Jigsaw
Miter saw
Sixteen-gage finish nailer
Two-inch finish nails
Black or grey paint if you want to color the walls behind the wood
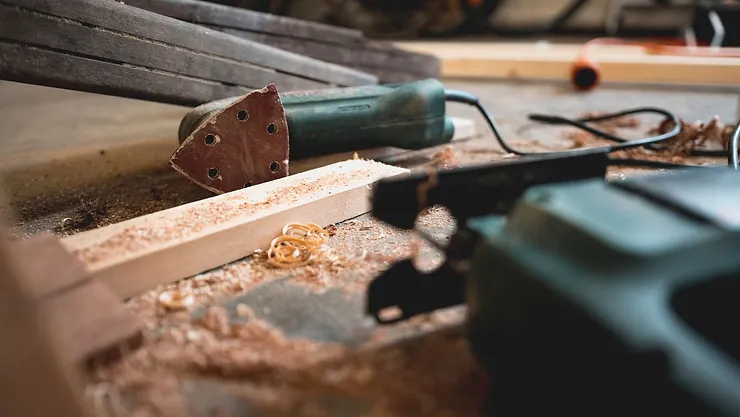
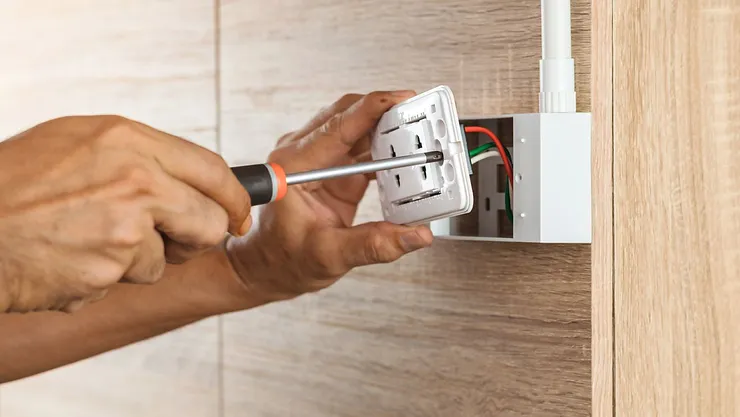
Begin prepping your walls by using a damp rag to clean the surface and remove any debris. Afterwards, remove any wall outlets,light switches, nails, and crown molding.
The next step to ensure that your wall is suitable for wood is to level it and draw a reference line to help you position the wood correctly.
Laser levels are ideal for this use. Alternatively, you may use a tape measure and a level. Consider using tape or a pencil for a more permanent placement of the reference line.

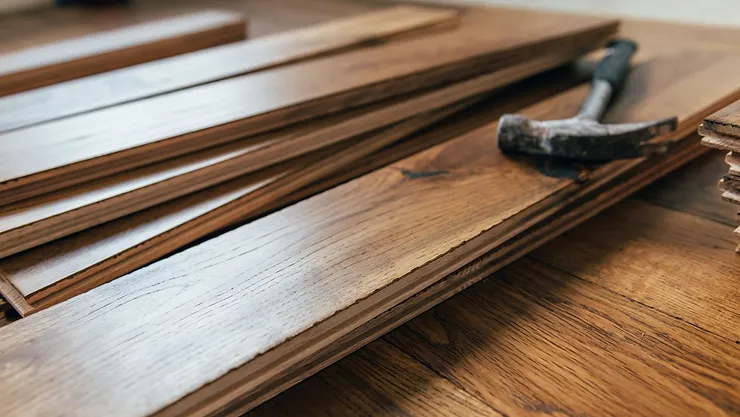
Ensure the panels adjust to their new surroundings. This will prevent the wood from shrinking or expanding before installation. Place the panels flat with shims between them to allow air to move through. There should be a 48-hour wait period before placing panels in a basement or other underground area. Otherwise, you must wait 24 hours.
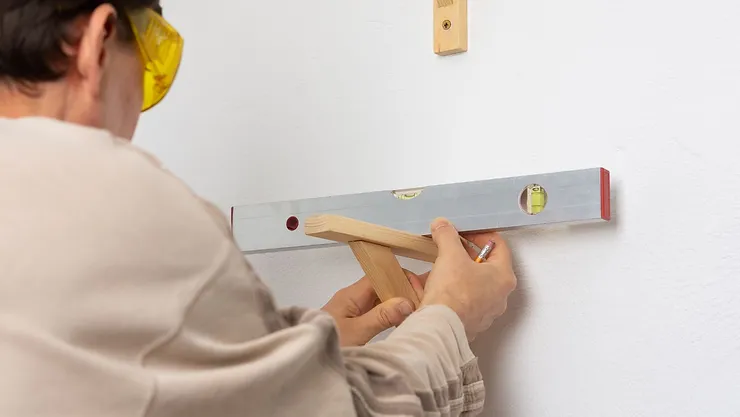
Using a stud finder, identify where your studs are located and mark the location of each with a soft lead pencil. Next, using a level in a straight edge, draw a vertical line to mark the location of each stud from floor to ceiling. Following these lines during installation will make sure your boards are secured properly so that they do not pull away from the wall over time.
If your wall has an outside corner, we recommend installing a vertical trim board to hide the edges of your horizontal boards.
Measure the length needed to complete your row and cut your boards to size using the miter saw. Start your installation at the bottom row. Using a level, install your first board against the far edge of the wall. Using the finish nailer, shoot two nails into the boards in line with your studs.
![{"type":"elementor","siteurl":"https://www.mfinelumber.com/wp-json/","elements":[{"id":"a1ecb66","elType":"widget","isInner":false,"isLocked":false,"settings":{"editor":"Step 5: Install Your Trim BoardsIf your wall has an outside corner, we recommend installing a vertical trim board to hide the edges of your horizontal boards.Step 6: Install Your BoardsMeasure the length needed to complete your row and cut your boards to size using the miter saw. Start your installation at the bottom row. Using a level, install your first board against the far edge of the wall. Using the finish nailer, shoot two nails into the boards in line with your studs.","drop_cap":"","text_columns":"","text_columns_tablet":"","text_columns_mobile":"","column_gap":{"unit":"px","size":"","sizes":[]},"column_gap_tablet":{"unit":"px","size":"","sizes":[]},"column_gap_mobile":{"unit":"px","size":"","sizes":[]},"align":"","align_tablet":"","align_mobile":"","text_color":"","typography_typography":"","typography_font_family":"","typography_font_size":{"unit":"px","size":"","sizes":[]},"typography_font_size_tablet":{"unit":"px","size":"","sizes":[]},"typography_font_size_mobile":{"unit":"px","size":"","sizes":[]},"typography_font_weight":"","typography_text_transform":"","typography_font_style":"","typography_text_decoration":"","typography_line_height":{"unit":"px","size":"","sizes":[]},"typography_line_height_tablet":{"unit":"em","size":"","sizes":[]},"typography_line_height_mobile":{"unit":"em","size":"","sizes":[]},"typography_letter_spacing":{"unit":"px","size":"","sizes":[]},"typography_letter_spacing_tablet":{"unit":"px","size":"","sizes":[]},"typography_letter_spacing_mobile":{"unit":"px","size":"","sizes":[]},"typography_word_spacing":{"unit":"px","size":"","sizes":[]},"typography_word_spacing_tablet":{"unit":"em","size":"","sizes":[]},"typography_word_spacing_mobile":{"unit":"em","size":"","sizes":[]},"text_shadow_text_shadow_type":"","text_shadow_text_shadow":{"horizontal":0,"vertical":0,"blur":10,"color":"rgba(0,0,0,0.3)"},"drop_cap_view":"default","drop_cap_primary_color":"","drop_cap_secondary_color":"","drop_cap_shadow_text_shadow_type":"","drop_cap_shadow_text_shadow":{"horizontal":0,"vertical":0,"blur":10,"color":"rgba(0,0,0,0.3)"},"drop_cap_size":{"unit":"px","size":5,"sizes":[]},"drop_cap_space":{"unit":"px","size":10,"sizes":[]},"drop_cap_border_radius":{"unit":"%","size":"","sizes":[]},"drop_cap_border_width":{"unit":"px","top":"","right":"","bottom":"","left":"","isLinked":true},"drop_cap_typography_typography":"","drop_cap_typography_font_family":"","drop_cap_typography_font_size":{"unit":"px","size":"","sizes":[]},"drop_cap_typography_font_size_tablet":{"unit":"px","size":"","sizes":[]},"drop_cap_typography_font_size_mobile":{"unit":"px","size":"","sizes":[]},"drop_cap_typography_font_weight":"","drop_cap_typography_text_transform":"","drop_cap_typography_font_style":"","drop_cap_typography_text_decoration":"","drop_cap_typography_line_height":{"unit":"px","size":"","sizes":[]},"drop_cap_typography_line_height_tablet":{"unit":"em","size":"","sizes":[]},"drop_cap_typography_line_height_mobile":{"unit":"em","size":"","sizes":[]},"drop_cap_typography_word_spacing":{"unit":"px","size":"","sizes":[]},"drop_cap_typography_word_spacing_tablet":{"unit":"em","size":"","sizes":[]},"drop_cap_typography_word_spacing_mobile":{"unit":"em","size":"","sizes":[]},"_title":"","_margin":{"unit":"px","top":"","right":"","bottom":"","left":"","isLinked":true},"_margin_tablet":{"unit":"px","top":"","right":"","bottom":"","left":"","isLinked":true},"_margin_mobile":{"unit":"px","top":"","right":"","bottom":"","left":"","isLinked":true},"_padding":{"unit":"px","top":"","right":"","bottom":"","left":"","isLinked":true},"_padding_tablet":{"unit":"px","top":"","right":"","bottom":"","left":"","isLinked":true},"_padding_mobile":{"unit":"px","top":"","right":"","bottom":"","left":"","isLinked":true},"_element_width":"","_element_width_tablet":"","_element_width_mobile":"","_element_custom_width":{"unit":"%","size":"","sizes":[]},"_element_custom_width_tablet":{"unit":"px","size":"","sizes":[]},"_element_custom_width_mobile":{"unit":"px","size":"","sizes":[]},"_element_vertical_align":"","_element_vertical_align_tablet":"","_element_vertical_align_mobile":"","_position":"","_offset_orientation_h":"start","_offset_x":{"unit":"px","size":"0","sizes":[]},"_offset_x_tablet":{"unit":"px","size":"","sizes":[]},"_offset_x_mobile":{"unit":"px","size":"","sizes":[]},"_offset_x_end":{"unit":"px","size":"0","sizes":[]},"_offset_x_end_tablet":{"unit":"px","size":"","sizes":[]},"_offset_x_end_mobile":{"unit":"px","size":"","sizes":[]},"_offset_orientation_v":"start","_offset_y":{"unit":"px","size":"0","sizes":[]},"_offset_y_tablet":{"unit":"px","size":"","sizes":[]},"_offset_y_mobile":{"unit":"px","size":"","sizes":[]},"_offset_y_end":{"unit":"px","size":"0","sizes":[]},"_offset_y_end_tablet":{"unit":"px","size":"","sizes":[]},"_offset_y_end_mobile":{"unit":"px","size":"","sizes":[]},"_z_index":"","_z_index_tablet":"","_z_index_mobile":"","_element_id":"","_css_classes":"","motion_fx_motion_fx_scrolling":"","motion_fx_translateY_effect":"","motion_fx_translateY_direction":"","motion_fx_translateY_speed":{"unit":"px","size":4,"sizes":[]},"motion_fx_translateY_affectedRange":{"unit":"%","size":"","sizes":{"start":0,"end":100}},"motion_fx_translateX_effect":"","motion_fx_translateX_direction":"","motion_fx_translateX_speed":{"unit":"px","size":4,"sizes":[]},"motion_fx_translateX_affectedRange":{"unit":"%","size":"","sizes":{"start":0,"end":100}},"motion_fx_opacity_effect":"","motion_fx_opacity_direction":"out-in","motion_fx_opacity_level":{"unit":"px","size":10,"sizes":[]},"motion_fx_opacity_range":{"unit":"%","size":"","sizes":{"start":20,"end":80}},"motion_fx_blur_effect":"","motion_fx_blur_direction":"out-in","motion_fx_blur_level":{"unit":"px","size":7,"sizes":[]},"motion_fx_blur_range":{"unit":"%","size":"","sizes":{"start":20,"end":80}},"motion_fx_rotateZ_effect":"","motion_fx_rotateZ_direction":"","motion_fx_rotateZ_speed":{"unit":"px","size":1,"sizes":[]},"motion_fx_rotateZ_affectedRange":{"unit":"%","size":"","sizes":{"start":0,"end":100}},"motion_fx_scale_effect":"","motion_fx_scale_direction":"out-in","motion_fx_scale_speed":{"unit":"px","size":4,"sizes":[]},"motion_fx_scale_range":{"unit":"%","size":"","sizes":{"start":20,"end":80}},"motion_fx_transform_origin_x":"center","motion_fx_transform_origin_y":"center","motion_fx_devices":["desktop","tablet","mobile"],"motion_fx_range":"","motion_fx_motion_fx_mouse":"","motion_fx_mouseTrack_effect":"","motion_fx_mouseTrack_direction":"","motion_fx_mouseTrack_speed":{"unit":"px","size":1,"sizes":[]},"motion_fx_tilt_effect":"","motion_fx_tilt_direction":"","motion_fx_tilt_speed":{"unit":"px","size":4,"sizes":[]},"sticky":"","sticky_on":["desktop","tablet","mobile"],"sticky_offset":0,"sticky_offset_tablet":"","sticky_offset_mobile":"","sticky_effects_offset":0,"sticky_effects_offset_tablet":"","sticky_effects_offset_mobile":"","sticky_parent":"","_animation":"","_animation_tablet":"","_animation_mobile":"","animation_duration":"","_animation_delay":"","_transform_rotate_popover":"","_transform_rotateZ_effect":{"unit":"px","size":"","sizes":[]},"_transform_rotateZ_effect_tablet":{"unit":"deg","size":"","sizes":[]},"_transform_rotateZ_effect_mobile":{"unit":"deg","size":"","sizes":[]},"_transform_rotate_3d":"","_transform_rotateX_effect":{"unit":"px","size":"","sizes":[]},"_transform_rotateX_effect_tablet":{"unit":"deg","size":"","sizes":[]},"_transform_rotateX_effect_mobile":{"unit":"deg","size":"","sizes":[]},"_transform_rotateY_effect":{"unit":"px","size":"","sizes":[]},"_transform_rotateY_effect_tablet":{"unit":"deg","size":"","sizes":[]},"_transform_rotateY_effect_mobile":{"unit":"deg","size":"","sizes":[]},"_transform_perspective_effect":{"unit":"px","size":"","sizes":[]},"_transform_perspective_effect_tablet":{"unit":"px","size":"","sizes":[]},"_transform_perspective_effect_mobile":{"unit":"px","size":"","sizes":[]},"_transform_translate_popover":"","_transform_translateX_effect":{"unit":"px","size":"","sizes":[]},"_transform_translateX_effect_tablet":{"unit":"px","size":"","sizes":[]},"_transform_translateX_effect_mobile":{"unit":"px","size":"","sizes":[]},"_transform_translateY_effect":{"unit":"px","size":"","sizes":[]},"_transform_translateY_effect_tablet":{"unit":"px","size":"","sizes":[]},"_transform_translateY_effect_mobile":{"unit":"px","size":"","sizes":[]},"_transform_scale_popover":"","_transform_keep_proportions":"yes","_transform_scale_effect":{"unit":"px","size":"","sizes":[]},"_transform_scale_effect_tablet":{"unit":"px","size":"","sizes":[]},"_transform_scale_effect_mobile":{"unit":"px","size":"","sizes":[]},"_transform_scaleX_effect":{"unit":"px","size":"","sizes":[]},"_transform_scaleX_effect_tablet":{"unit":"px","size":"","sizes":[]},"_transform_scaleX_effect_mobile":{"unit":"px","size":"","sizes":[]},"_transform_scaleY_effect":{"unit":"px","size":"","sizes":[]},"_transform_scaleY_effect_tablet":{"unit":"px","size":"","sizes":[]},"_transform_scaleY_effect_mobile":{"unit":"px","size":"","sizes":[]},"_transform_skew_popover":"","_transform_skewX_effect":{"unit":"px","size":"","sizes":[]},"_transform_skewX_effect_tablet":{"unit":"deg","size":"","sizes":[]},"_transform_skewX_effect_mobile":{"unit":"deg","size":"","sizes":[]},"_transform_skewY_effect":{"unit":"px","size":"","sizes":[]},"_transform_skewY_effect_tablet":{"unit":"deg","size":"","sizes":[]},"_transform_skewY_effect_mobile":{"unit":"deg","size":"","sizes":[]},"_transform_flipX_effect":"","_transform_flipY_effect":"","_transform_rotate_popover_hover":"","_transform_rotateZ_effect_hover":{"unit":"px","size":"","sizes":[]},"_transform_rotateZ_effect_hover_tablet":{"unit":"deg","size":"","sizes":[]},"_transform_rotateZ_effect_hover_mobile":{"unit":"deg","size":"","sizes":[]},"_transform_rotate_3d_hover":"","_transform_rotateX_effect_hover":{"unit":"px","size":"","sizes":[]},"_transform_rotateX_effect_hover_tablet":{"unit":"deg","size":"","sizes":[]},"_transform_rotateX_effect_hover_mobile":{"unit":"deg","size":"","sizes":[]},"_transform_rotateY_effect_hover":{"unit":"px","size":"","sizes":[]},"_transform_rotateY_effect_hover_tablet":{"unit":"deg","size":"","sizes":[]},"_transform_rotateY_effect_hover_mobile":{"unit":"deg","size":"","sizes":[]},"_transform_perspective_effect_hover":{"unit":"px","size":"","sizes":[]},"_transform_perspective_effect_hover_tablet":{"unit":"px","size":"","sizes":[]},"_transform_perspective_effect_hover_mobile":{"unit":"px","size":"","sizes":[]},"_transform_translate_popover_hover":"","_transform_translateX_effect_hover":{"unit":"px","size":"","sizes":[]},"_transform_translateX_effect_hover_tablet":{"unit":"px","size":"","sizes":[]},"_transform_translateX_effect_hover_mobile":{"unit":"px","size":"","sizes":[]},"_transform_translateY_effect_hover":{"unit":"px","size":"","sizes":[]},"_transform_translateY_effect_hover_tablet":{"unit":"px","size":"","sizes":[]},"_transform_translateY_effect_hover_mobile":{"unit":"px","size":"","sizes":[]},"_transform_scale_popover_hover":"","_transform_keep_proportions_hover":"yes","_transform_scale_effect_hover":{"unit":"px","size":"","sizes":[]},"_transform_scale_effect_hover_tablet":{"unit":"px","size":"","sizes":[]},"_transform_scale_effect_hover_mobile":{"unit":"px","size":"","sizes":[]},"_transform_scaleX_effect_hover":{"unit":"px","size":"","sizes":[]},"_transform_scaleX_effect_hover_tablet":{"unit":"px","size":"","sizes":[]},"_transform_scaleX_effect_hover_mobile":{"unit":"px","size":"","sizes":[]},"_transform_scaleY_effect_hover":{"unit":"px","size":"","sizes":[]},"_transform_scaleY_effect_hover_tablet":{"unit":"px","size":"","sizes":[]},"_transform_scaleY_effect_hover_mobile":{"unit":"px","size":"","sizes":[]},"_transform_skew_popover_hover":"","_transform_skewX_effect_hover":{"unit":"px","size":"","sizes":[]},"_transform_skewX_effect_hover_tablet":{"unit":"deg","size":"","sizes":[]},"_transform_skewX_effect_hover_mobile":{"unit":"deg","size":"","sizes":[]},"_transform_skewY_effect_hover":{"unit":"px","size":"","sizes":[]},"_transform_skewY_effect_hover_tablet":{"unit":"deg","size":"","sizes":[]},"_transform_skewY_effect_hover_mobile":{"unit":"deg","size":"","sizes":[]},"_transform_flipX_effect_hover":"","_transform_flipY_effect_hover":"","_transform_transition_hover":{"unit":"px","size":"","sizes":[]},"motion_fx_transform_x_anchor_point":"","motion_fx_transform_x_anchor_point_tablet":"","motion_fx_transform_x_anchor_point_mobile":"","motion_fx_transform_y_anchor_point":"","motion_fx_transform_y_anchor_point_tablet":"","motion_fx_transform_y_anchor_point_mobile":"","_background_background":"","_background_color":"","_background_color_stop":{"unit":"%","size":0,"sizes":[]},"_background_color_b":"#f2295b","_background_color_b_stop":{"unit":"%","size":100,"sizes":[]},"_background_gradient_type":"linear","_background_gradient_angle":{"unit":"deg","size":180,"sizes":[]},"_background_gradient_position":"center center","_background_image":{"url":"","id":"","size":""},"_background_image_tablet":{"url":"","id":"","size":""},"_background_image_mobile":{"url":"","id":"","size":""},"_background_position":"","_background_position_tablet":"","_background_position_mobile":"","_background_xpos":{"unit":"px","size":0,"sizes":[]},"_background_xpos_tablet":{"unit":"px","size":0,"sizes":[]},"_background_xpos_mobile":{"unit":"px","size":0,"sizes":[]},"_background_ypos":{"unit":"px","size":0,"sizes":[]},"_background_ypos_tablet":{"unit":"px","size":0,"sizes":[]},"_background_ypos_mobile":{"unit":"px","size":0,"sizes":[]},"_background_attachment":"","_background_repeat":"","_background_repeat_tablet":"","_background_repeat_mobile":"","_background_size":"","_background_size_tablet":"","_background_size_mobile":"","_background_bg_width":{"unit":"%","size":100,"sizes":[]},"_background_bg_width_tablet":{"unit":"px","size":"","sizes":[]},"_background_bg_width_mobile":{"unit":"px","size":"","sizes":[]},"_background_video_link":"","_background_video_start":"","_background_video_end":"","_background_play_once":"","_background_play_on_mobile":"","_background_privacy_mode":"","_background_video_fallback":{"url":"","id":"","size":""},"_background_slideshow_gallery":[],"_background_slideshow_loop":"yes","_background_slideshow_slide_duration":5000,"_background_slideshow_slide_transition":"fade","_background_slideshow_transition_duration":500,"_background_slideshow_background_size":"","_background_slideshow_background_size_tablet":"","_background_slideshow_background_size_mobile":"","_background_slideshow_background_position":"","_background_slideshow_background_position_tablet":"","_background_slideshow_background_position_mobile":"","_background_slideshow_lazyload":"","_background_slideshow_ken_burns":"","_background_slideshow_ken_burns_zoom_direction":"in","_background_hover_background":"","_background_hover_color":"","_background_hover_color_stop":{"unit":"%","size":0,"sizes":[]},"_background_hover_color_b":"#f2295b","_background_hover_color_b_stop":{"unit":"%","size":100,"sizes":[]},"_background_hover_gradient_type":"linear","_background_hover_gradient_angle":{"unit":"deg","size":180,"sizes":[]},"_background_hover_gradient_position":"center center","_background_hover_image":{"url":"","id":"","size":""},"_background_hover_image_tablet":{"url":"","id":"","size":""},"_background_hover_image_mobile":{"url":"","id":"","size":""},"_background_hover_position":"","_background_hover_position_tablet":"","_background_hover_position_mobile":"","_background_hover_xpos":{"unit":"px","size":0,"sizes":[]},"_background_hover_xpos_tablet":{"unit":"px","size":0,"sizes":[]},"_background_hover_xpos_mobile":{"unit":"px","size":0,"sizes":[]},"_background_hover_ypos":{"unit":"px","size":0,"sizes":[]},"_background_hover_ypos_tablet":{"unit":"px","size":0,"sizes":[]},"_background_hover_ypos_mobile":{"unit":"px","size":0,"sizes":[]},"_background_hover_attachment":"","_background_hover_repeat":"","_background_hover_repeat_tablet":"","_background_hover_repeat_mobile":"","_background_hover_size":"","_background_hover_size_tablet":"","_background_hover_size_mobile":"","_background_hover_bg_width":{"unit":"%","size":100,"sizes":[]},"_background_hover_bg_width_tablet":{"unit":"px","size":"","sizes":[]},"_background_hover_bg_width_mobile":{"unit":"px","size":"","sizes":[]},"_background_hover_video_link":"","_background_hover_video_start":"","_background_hover_video_end":"","_background_hover_play_once":"","_background_hover_play_on_mobile":"","_background_hover_privacy_mode":"","_background_hover_video_fallback":{"url":"","id":"","size":""},"_background_hover_slideshow_gallery":[],"_background_hover_slideshow_loop":"yes","_background_hover_slideshow_slide_duration":5000,"_background_hover_slideshow_slide_transition":"fade","_background_hover_slideshow_transition_duration":500,"_background_hover_slideshow_background_size":"","_background_hover_slideshow_background_size_tablet":"","_background_hover_slideshow_background_size_mobile":"","_background_hover_slideshow_background_position":"","_background_hover_slideshow_background_position_tablet":"","_background_hover_slideshow_background_position_mobile":"","_background_hover_slideshow_lazyload":"","_background_hover_slideshow_ken_burns":"","_background_hover_slideshow_ken_burns_zoom_direction":"in","_background_hover_transition":{"unit":"px","size":"","sizes":[]},"_border_border":"","_border_width":{"unit":"px","top":"","right":"","bottom":"","left":"","isLinked":true},"_border_width_tablet":{"unit":"px","top":"","right":"","bottom":"","left":"","isLinked":true},"_border_width_mobile":{"unit":"px","top":"","right":"","bottom":"","left":"","isLinked":true},"_border_color":"","_border_radius":{"unit":"px","top":"","right":"","bottom":"","left":"","isLinked":true},"_border_radius_tablet":{"unit":"px","top":"","right":"","bottom":"","left":"","isLinked":true},"_border_radius_mobile":{"unit":"px","top":"","right":"","bottom":"","left":"","isLinked":true},"_box_shadow_box_shadow_type":"","_box_shadow_box_shadow":{"horizontal":0,"vertical":0,"blur":10,"spread":0,"color":"rgba(0,0,0,0.5)"},"_box_shadow_box_shadow_position":" ","_border_hover_border":"","_border_hover_width":{"unit":"px","top":"","right":"","bottom":"","left":"","isLinked":true},"_border_hover_width_tablet":{"unit":"px","top":"","right":"","bottom":"","left":"","isLinked":true},"_border_hover_width_mobile":{"unit":"px","top":"","right":"","bottom":"","left":"","isLinked":true},"_border_hover_color":"","_border_radius_hover":{"unit":"px","top":"","right":"","bottom":"","left":"","isLinked":true},"_border_radius_hover_tablet":{"unit":"px","top":"","right":"","bottom":"","left":"","isLinked":true},"_border_radius_hover_mobile":{"unit":"px","top":"","right":"","bottom":"","left":"","isLinked":true},"_box_shadow_hover_box_shadow_type":"","_box_shadow_hover_box_shadow":{"horizontal":0,"vertical":0,"blur":10,"spread":0,"color":"rgba(0,0,0,0.5)"},"_box_shadow_hover_box_shadow_position":" ","_border_hover_transition":{"unit":"px","size":"","sizes":[]},"_mask_switch":"","_mask_shape":"circle","_mask_image":{"url":"","id":"","size":""},"_mask_notice":"","_mask_size":"contain","_mask_size_tablet":"","_mask_size_mobile":"","_mask_size_scale":{"unit":"%","size":100,"sizes":[]},"_mask_size_scale_tablet":{"unit":"px","size":"","sizes":[]},"_mask_size_scale_mobile":{"unit":"px","size":"","sizes":[]},"_mask_position":"center center","_mask_position_tablet":"","_mask_position_mobile":"","_mask_position_x":{"unit":"%","size":0,"sizes":[]},"_mask_position_x_tablet":{"unit":"px","size":"","sizes":[]},"_mask_position_x_mobile":{"unit":"px","size":"","sizes":[]},"_mask_position_y":{"unit":"%","size":0,"sizes":[]},"_mask_position_y_tablet":{"unit":"px","size":"","sizes":[]},"_mask_position_y_mobile":{"unit":"px","size":"","sizes":[]},"_mask_repeat":"no-repeat","_mask_repeat_tablet":"","_mask_repeat_mobile":"","hide_desktop":"","hide_tablet":"","hide_mobile":"","_attributes":"","custom_css":""},"defaultEditSettings":{"defaultEditRoute":"content"},"elements":[],"title":"Text Editor","categories":["basic"],"keywords":["text","editor"],"icon":"eicon-text","widgetType":"text-editor","hideOnSearch":false,"editSettings":{"defaultEditRoute":"content","panel":{"activeTab":"content","activeSection":"section_editor"}},"htmlCache":""}]}](https://www.mfinelumber.com/wp-content/uploads/2023/12/A-Step-by-Step-Guide-on-How-to-Install-Paneling-Over-Drywall-4.webp)
With a few simple tools and some basic carpentry skills, you can install paneling over your drywall in no time. By following the steps we’ve outlined in this guide, you can have a beautiful new accent wall that adds value to your home. Have any questions about the process? Leave them in the comments below, and we’ll do our best to answer them.
