get a free quote

Tricks for a Smooth and Seamless Floating Floor Installation

Installing a floating floor can be an excellent way to enhance the aesthetics and functionality of your space. However, achieving perfectly straight rows is a crucial aspect of the installation process that cannot be overlooked. Straight rows not only contribute to the overall visual appeal of the flooring but also ensure stability and durability. To help you lay your floating floor in perfectly straight rows, this blog will go over a number of methods and strategies. From preparing the subfloor to utilizing the right tools and equipment, we will cover everything you need to know to create a stunning and professionally installed floating floor.

Benefits of Floating Floor Installation

When installing flooring, a floating floor is used so that the individual boards or tiles are not fastened directly to the subfloor. Instead, they are locked into place or adhered to one another. As a result, the floor can “float” above the subfloor and move up and down in response to variations in humidity and temperature.

floating floor

There are several advantages to choosing a floating floor installation. First and foremost, it is easier and less time-consuming compared to traditional methods. You don’t have to deal with messy adhesives or complicated nail-down processes. Floating floors are also more forgiving when it comes to minor imperfections in the subfloor, making them suitable for DIY projects. Additionally, they can be easily removed or replaced without damaging the subfloor, providing more flexibility for remodeling in the future.

Understanding Expansion and Contraction

One of the key factors to consider when installing a floating floor is the natural tendency of the flooring material to expand and contract with changes in temperature and humidity. This is especially important when dealing with materials like engineered hardwood and cork. For instance, in very dry or humid regions, gluing the floor down would limit the expansion and contraction of the floor. In the case of concrete subfloors, this method allows for a large, continuous installation with fewer transition pieces.

How to Correctly Start from the Longest Wall

To start, find the longest exterior wall as a reference. Measure and draw a chalk line from one end of the room to the other. This chalk line will serve as a guide throughout the installation process. As you lay each plank, make sure it remains parallel to the chalk line to keep the floors straight.

  • Ensure the Tongue Side is Facing the Right Direction

Engineered wood and cork flooring planks have a tongue on one side and a groove on the other. These features allow the planks to lock together securely. When you’re installing your floating floor, it’s essential to ensure that the tongue side facing is in the right direction.As a general rule, the tongue should always face the part of the room you’re working towards. So, if you’re starting at the longest wall and working your way towards the opposite wall, the tongue side faces away from the wall you started on. This orientation makes it easier to interlock the planks as you proceed with the installation.

  • Installing the Underlayment

An underlayment is a layer of material that’s installed between the subfloor and the floating floor. This crucial component performs several functions. First, it provides a moisture barrier, which is particularly important if you’re installing your floating floor over a concrete subfloor. Second, it offers some degree of sound dampening, making your floor quieter to walk on. Lastly, it can also add a layer of thermal insulation, helping to keep your room warm in the winter and cool in the summer.

Installing the Underlayment

How to Install the Underlayment

Once you’ve prepared your subfloor, roll out the underlayment. As little as a 2mm thick underlayment can be cost-effective while offering good moisture and sound protection. Make sure it covers the entire floor surface, trimming it as necessary with a utility knife. If your underlayment comes in sections, use duct tape to secure the seams together. Remember to avoid overlapping the underlayment, as this could create unevenness on your final flooring surface.

Utilizing a Tapping Block

A tapping block is a handy tool used during the installation of floating floors. It’s used to gently knock the planks together and ensure a tight fit without damaging the edges. Using a tapping block instead of directly hitting the planks can prevent damages to the tongue and groove system.

How to Effectively Use a Tapping Block During Installation

When using a tapping block, position it against the edge of the plank you’re installing. Then, using a mallet, gently tap the block to push the plank into position. Continue tapping until the plank locks tightly with the adjacent one. Always remember to tap gently and gradually to avoid damaging the plank.

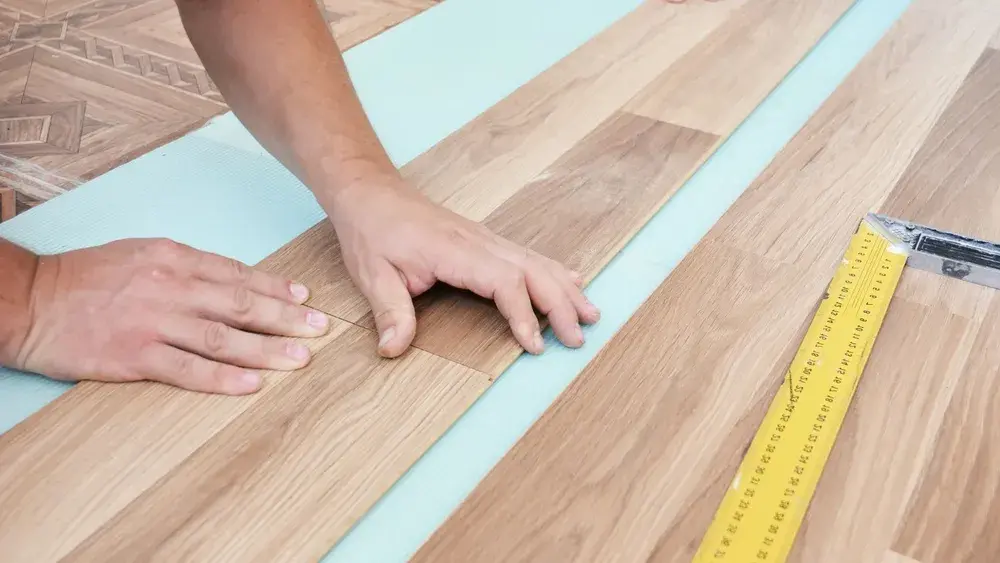
  • How to Accurately Measure the Perimeter of the Room

Start by measuring the length and width of the room at multiple points. Remember, not all rooms are perfectly square, so taking multiple measurements can give you a better idea of what you’re dealing with. If you’re installing cork flooring, for instance, calculate the number of courses needed to cover the hardwood floor by dividing the room’s width by the width of a cork plank. This will help you determine if you need to trim the first and last courses for a balanced layout.

Proper Use of Tools (Utility Knife, Duct Tape, Pry Bar)

The right tools can make all the difference in a flooring installation project. Some essential tools include a utility knife, duct tape, a pry bar, a jigsaw, and a tapping block. A utility knife is used to cut the underlayment and trim the flooring planks as needed. Duct tape is useful for securing the seams of the underlayment. A pry bar helps in removing existing baseboards and trim, while a jigsaw is handy for making precise cuts around door jambs and other features. A tapping block, as mentioned earlier, helps ensure a tight fit between the planks.

How to Properly Use Each Tool During the Installation Process

Using these tools effectively requires some practice. When using a utility knife, ensure you cut on a stable surface and keep your hands clear of the blade. When applying duct tape, press down firmly to make sure it sticks properly to the underlayment. When using a pry bar, work gradually to avoid damaging the baseboards or trim. When operating a jigsaw, follow safety instructions and maintain a steady hand for clean cuts. Lastly, when using a tapping block, remember to tap gently and gradually to avoid damaging the planks.

Use Each Tool During the Installation Process

To sum up, a successful floating floor installation begins with understanding the specific needs of your chosen flooring material and ends with the proper use of tools. By paying careful attention to factors such as expansion and contraction, the direction of the tongue side, and the role of underlayment, you can ensure that your new floor is not only beautiful but also durable. Add to that the tricks of starting from the longest wall, utilizing a tapping block, and accurately measuring the room’s perimeter, and you’re well on your way to becoming a pro at floating floor installation.

Leave a Reply

Your email address will not be published. Required fields are marked *

On Key

Related Posts